Challenge 0: Getting Setup
Before you start
Before jumping into our first project, we'll need to make sure that you have completed all of the setup steps.
Please read and complete the steps in the Getting Setup guide.
It's important that you've got all of the software installed that we require before continuing.
1. Cloning The Coursework Repo
To get started you'll want to fork and clone the coursework repo so that you can work on the materials more easily.
Every week of the course has its own coursework repository so you'll have to do this every week.
- Fork this repo on Github
- Clone the repository to your Laptop
- When prompted for a password, you'll need to generate a Personal Access Token (PAT) to use instead of a password. You should follow the instructions here.
- When you create your PAT, you must enable 'Workflows'. This lets us run tests on your code when you push them to GitHub.
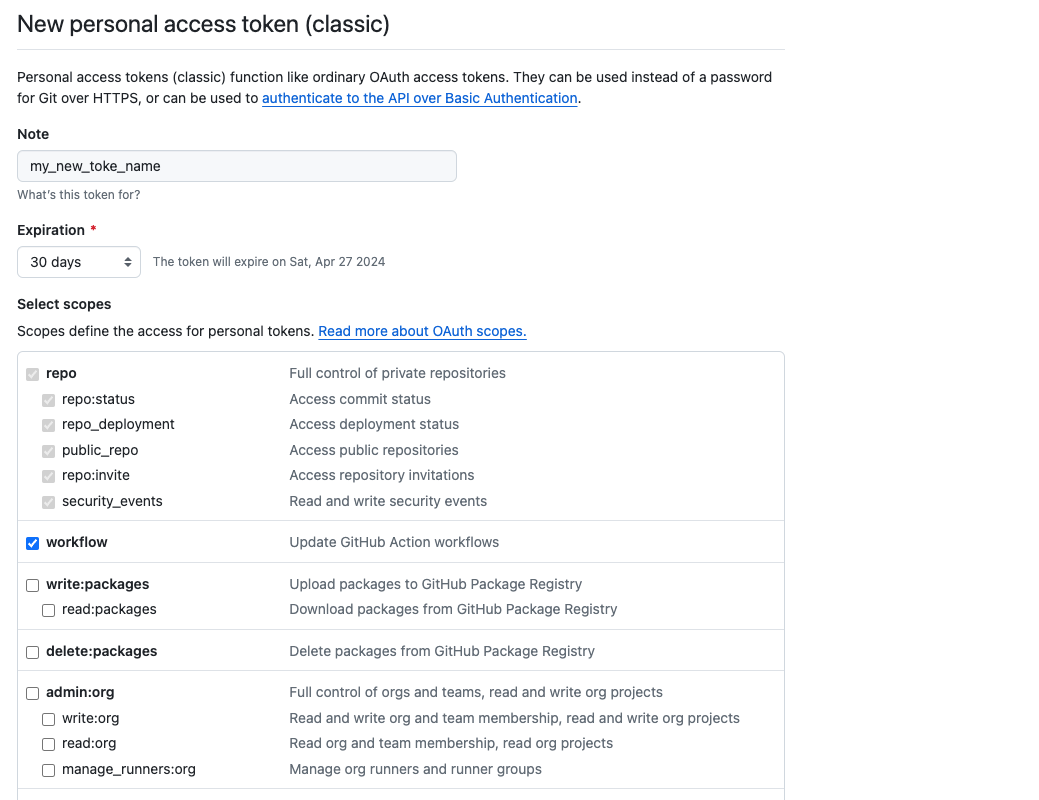
- When you create your PAT, you must enable 'Workflows'. This lets us run tests on your code when you push them to GitHub.
- Enter your username and PAT as the password
- Open the cloned repo in VSCode
2. Create a venv
We're going to be using a 'virtual environment' to manage our dependencies. This is a good practice to get into as it means that we can have different versions of the same package installed on our machine without them conflicting.
If this is your first time using a virtual environment, then watch the first three minutes of this video here.
- Open a terminal in VSCode
- Run the command
python3 -m venv .venv - Run the command
source .venv/bin/activateto activate the virtual environment
3. Install the dependencies
We're going to be using pytest to run our tests. This is a popular testing framework for Python.
- Run the command
pip3 install -r requirements.txt - Run the command
pytestto check that everything is working